


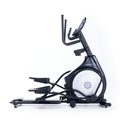
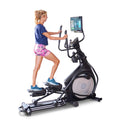


Bikes ·
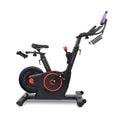
Echelon 101 ·
Bike Maintenance Schedule: Ensuring the Longevity and Safety of Your Bike.

In order to ensure the quality of your cycling experience and maintain the safety of your equipment, it is important to adhere to a regular maintenance schedule. The following tasks should be completed on a daily, weekly, monthly, and yearly basis:
Daily
- Inspect the pedals for any looseness or deformation before each ride. Cease using the equipment immediately and call customer service if any issues are found.
- Check SPD cleats (if using cycling shoes) to ensure they are oriented straight and tightened down to avoid any potential malfunction while riding.
- Power off the bike and clean high use or exposed areas with a non-acidic cleaner. Be careful not to spray any solution directly onto the bike, as this could ruin electrical components, ports, or the tablet (on specific models). Raise seat and handlebar posts to their highest setting to expose any excess moisture.
- Inspect the power cord for damage. If damaged, replace immediately by calling customer service. Store equipment in a secure dry area away from children.
- Inspect for any noises that could indicate potential issues. If a troubling noise is heard, contact customer service for any service needs.
- For all screened devices, it is crucial to clean sweat and fingerprint marks from the tablet screen using touchscreen screen cleaner after each use. Simply spray a microfiber rag with the cleaner and wipe in circular motions until the solution clears. Finally, clean the top of the rail with soapy water and a soft, dry cloth to remove any dust, debris, or sweat before and after each use.
Weekly
- Inspect all assembled and pre-assembled hardware to ensure proper tightening and security. This includes, but is not limited to, height and distance adjustment knobs/levers, tablet securing screws (select models), dumbbell rack and drink holder bolts, handlebar securing bolts (select models), bolts for the tablet mount, hinge bolt for tablet mount (select models), SPD clips and toe cages, and seat clamp.
- Apply thread locker to pedal threads if equipment is used more than 2 to 5 times a week.
- Power off the bike, dust, vacuum, and wipe down all areas around and on the bike that are not normally cleaned in daily cleaning procedures. Move the bike to a staging area for cleaning if cleaning on stainable flooring.
- Ensure app and equipment firmware are up to date with the latest versions.
- Assess the feet leveling system to make sure the bike is sitting level to the floor. Adjust all four rubber feet accordingly. Adjust the left foot if the bike is leaning to the left and vice versa.
Monthly
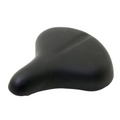
- Assess saddle and handlebar adjustments for wear and tear. If a replacement is needed, contact customer service.
- Assess the quality of the drive belt every 5-6 months by CAREFULLY removing screws from the right side frame cover and using a flashlight to assess the belt from the top down while pedaling with one hand.
- Check nylon foot straps on toe cages for wear.
As Needed
- Test brake pads for wear periodically by utilizing the emergency brake a few times during a controlled sprint.
- Adjust belt tension for slipping as follows: open the right side panel by removing the bolt positioned over the flywheel, remove screws around the perimeter of the flywheel cover, remove all conjoining screws from the opposite side of the flywheel cover, peel back the plastic cover to expose the belt tension nut, use a 3/8" ratchet wrench with a 6" extension and a 13mm socket to tighten the nut from the underside of the bike (may require assistance keeping the frame open), tighten 1/4 turn, resecure the flywheel cover bolt, and test until forward momentum feels smooth. It is important to follow proper adjustment to avoid premature belt fraying and damage.
Yearly
- Assess the quality of the resistance encoder by removing the tape surrounding the resistance knob, using a small Phillips head screwdriver to remove all (4) screws surrounding the knob and removing the knob, assessing the motherboard for any dust, damage, or corrosion caused by sweat, and cleaning the area for dust and debris with compressed air. If a new resistance knob or resistance encoder is needed, call customer service for a replacement.
- Inspect vertical and horizontal adjustment knobs and call customer service for replacements if they are worn out. When this occurs, the user will be unable to tighten the lever or knob down, no matter how hard they try.
By adhering to this maintenance schedule, you can ensure the longevity and safety of your bike, allowing you to enjoy many successful cycling sessions. For additional information, please refer to the instruction manual.


